How to replace a sump pump drain system
A basement’s drain system is one of the most important safety features in a home.
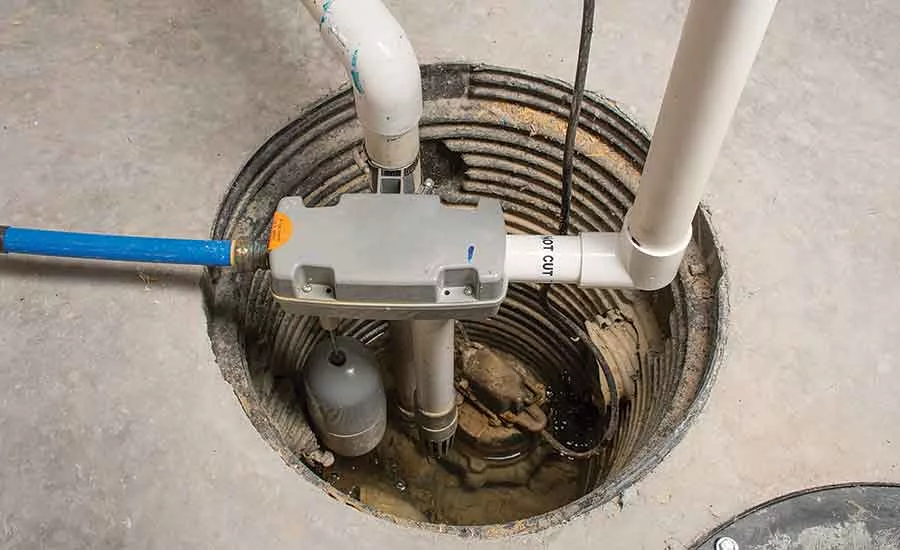
A functioning drain system and sump pump help keep the home’s basement dry. Photo credit: Vincent West
A basement’s drain system is one of the most important safety features in a home. A well-functioning drainage system is meant to keep the home’s basement dry. Water damage in a home’s basement can cause extensive structural damage, and potential health problems stemming from mold growth in a wet environment.
Replacing a home’s drainage system can seem daunting, but with a little help, you can prevent a catastrophe that can cost tens of thousands of dollars to repair.
This article will provide an overview of how to replace a sump pump-style drain system. This is the most common system used in homes that can expect to receive water in their basements on a semi-regular basis.
Step 1: Prepare
On the outside edge of the basement floor, mark with chalk or spray paint about 12-15 inches away from the wall. Starting at the line, use a jack hammer to chip away the concrete. You will need to work starting from the line and moving toward the wall.
Once you get a couple inches from the wall, it is best to remove the rest of the concrete floor manually. A pick axe is best for this ‘trim’ work.
Step 2: Drain the ditch
Using the jackhammer, you will need to create a ditch that is 6-8 inches deep and 10-12 inches wide. This is where you will later lay the drain tiles that will direct the water to your sump pump.
Remember that when working with concrete and using power tools, you should exercise caution. Wear appropriate eye and hearing protection and steel/composite-toed footwear.
Step 3: Install the drain tile
Now that you have dug the ditch, you will need to waterproof it by painting a waterproofing membrane onto the walls of the ditch. There are a number of waterproofing paints available at your local home improvement store. The purpose is twofold: It prevents water from seeping into the walls and allows the water to move freely to the direction you want.
Next, you will need to pour about 2-3 inches of gravel into the ditch. Start at the farthest point from the sump and tamp the gravel down as you move toward the sump. You will want to slope the gravel down toward the sump, as you are basically directing the water where to go.
Using a handsaw, cut pieces of drain tile to fit into your ditch. This tile is a perforated pipe or PVC that allows the water to drain into it and travel to the sump pump. At the corner opposite of the sump, attach a PVSC elbow pointing straight up towards the ceiling. This will give you or the homeowner access to the drain tile in the case of clogging in the future. Run the drain tile all through the ditch toward the sump pump.
After installing the drain tile, wrap it with a mesh that is typically called landscaping fabric. This will keep dust and dirt from getting into the drain tile and clogging it. You will want to make sure that the drain tile is centered in the ditch before the next step.
Fill the rest of the ditch with enough gravel to bring it even with the bottom of the cement slab.
Pour cement into the ditch, enough to bring it even with the floor slab. Smooth the wet cement surface with a trowel, discarding any waste. For a seamless look, blend the wet cement into the existing floor slab. Allow the cement to set overnight or as directed by the cement manufacturer.
Note that if the floor is “floating,” you will need to place a piece of wood (plywood works fine) along the edge of the slab, between the slab and the wall, to prevent the cement from traveling into the wall. Once cement is set, this will need to be removed.
Step 4: Install the sump pump
The first step in installing the sump pump is to dig a hole in the corner where the drain tiles lead to. The hole should be about 12 inches wider than the circumference of the pump. You will need to place 2-3 inches of leveled gravel into the hole and place the sump centered in the hole.
Fill in the hole around the sump with gravel. Fill in to approximately 3-4 inches from the top.
For the following step, make sure you do some research on all the pieces that a sump pump kit contains.
Glue the male adapter that comes with the pump installation kit to the discharge pipe from your drainage pipe. Insert that male adapter onto the female adapter on the pump.
Next, you will need to drill a ¼-inch hole through the discharge pipe several inches above the pump (4-6 inches). This “weep hole” allows water back into the pump when it is off.
Attach the electrical cord to the discharge pipe using zip ties. Install the check valve on the open end of the discharge pipe. This check valve should come with the pump and should be for vertical use.
Fit 1.5-inch PVC pipe onto the discharge pipe and run it to the outside wall, approximately 6 inches from the ground.
Make a hole through the outside wall to run the PVC out. Use a core drill and a 1-5/8 bit through the foundation wall. Always wear a respirator when drilling through a foundation. Run the PVC pipe through the hole and fill in the gaps with silicone to ensure a good fit. Run some water through drain tiles, turn the pump on and check for any leaks.
Conclusion
Replacing the basement drainage system is one of the most important projects to protect a home from major foundation problems in the future. The job should be done the right way, without skipping any steps.
This project should be able to be completed in one day but should not be rushed. Water will find its way to the basement of every home, and a properly installed sump pump will ensure the home is around for decades to come.
Looking for a reprint of this article?
From high-res PDFs to custom plaques, order your copy today!


