Supply box installation steps and best practices for plumbing pros
Supply boxes offer a crisp, clean finished appearance, as well as quick access to water shutoff.
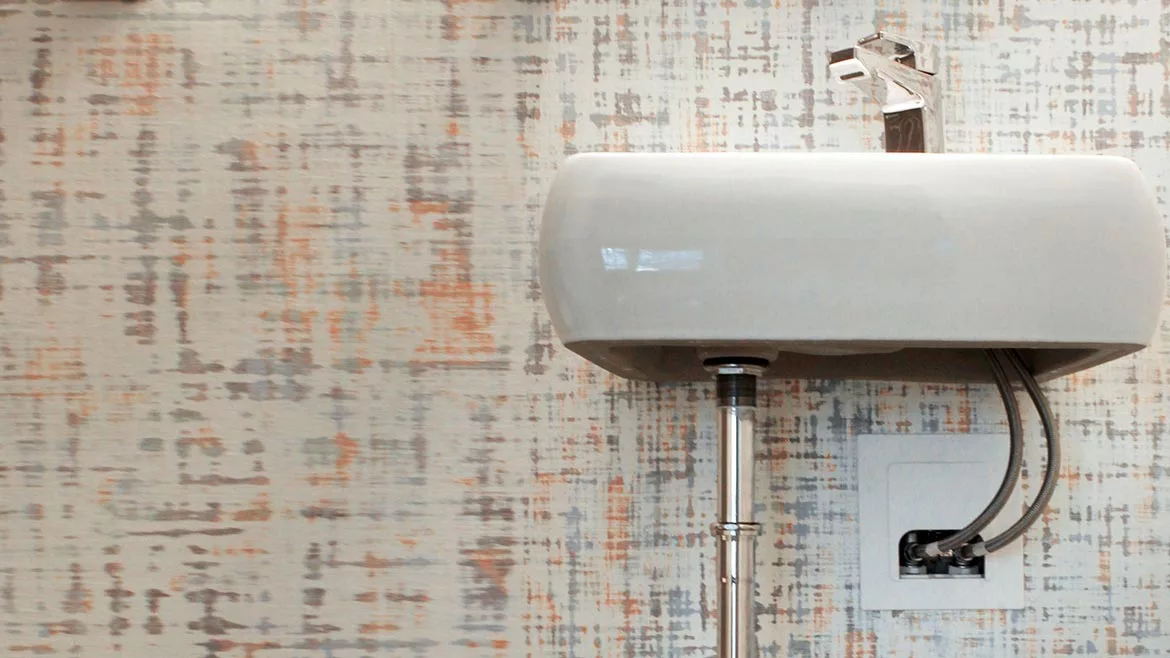
There are many benefits to including supply boxes, also known as outlet boxes, in new construction or renovation. Among these benefits for end-users are a crisp and clean finished appearance, as well as quick and safe access to water shutoff valves in case of an emergency.
But while supply boxes are certainly beneficial to the home or building owner, installation time and simplicity are major considerations for plumbers.
Why use a supply box?
Cost and time savings: On conventional plumbing installations involving washing machine, lavatory, toilet and sink applications, you would stub out the rough-in coming out of the wall, capping that line off with a four- or five-inch copper stub-out. Once a successful pressure test confirms no leaks, you would return to cut off the cap and attach the proper compression valve trim for an eventual hookup to the washing machine, toilet or sink. In contrast, a supply box allows you to skip that interim step with the copper stub-out. You simply rough-in the supply box during the initial step, including the compression valve itself. Cutting out those steps reduces the labor, which equals cost savings for the installer.
Space savings: When water lines go through the floor or wall, these pipes typically stick out from the wall, so that appliances cannot be set flush against it. A supply box provides a recessed space for those valves in the wall so that a refrigerator or washing machine need not stick out so far. Saving these extra inches enables you to make the most out of the square footage in the room.
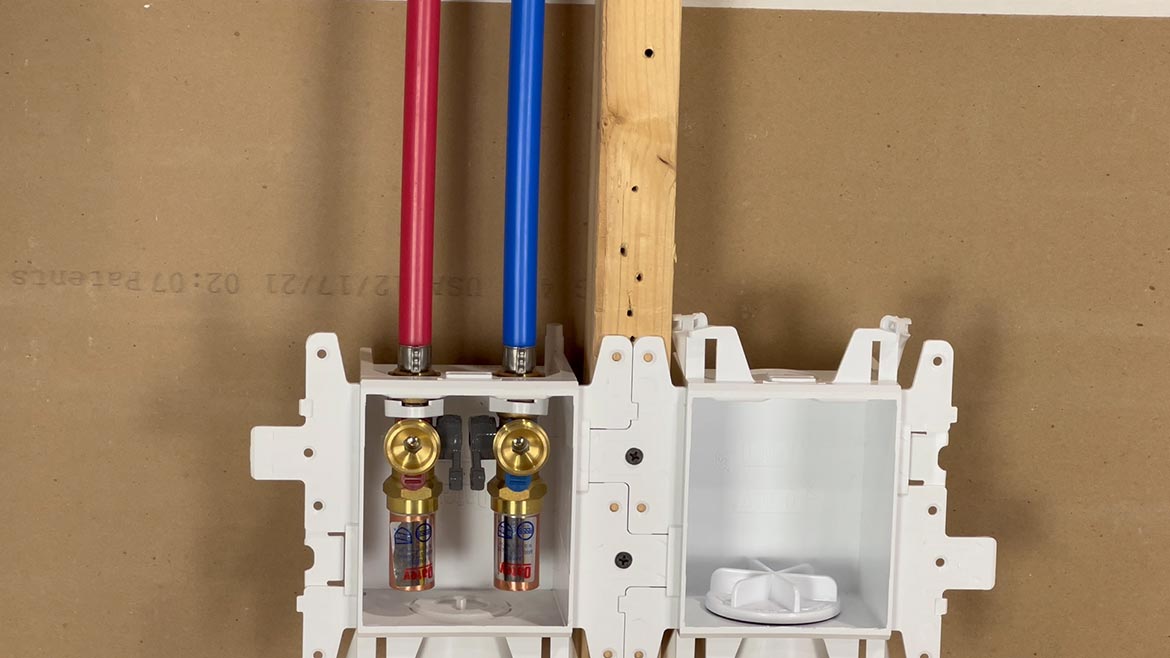
Types of supply boxes on the market
With many options available today, it is helpful to understand the different types and identify the particular supply box that makes sense for your application.
Washing machine supply boxes can be used in commercial or residential applications that require supply valves and waste drains recessed into the wall. This box is designed as a termination point for all drain and water connections necessary when installing a washing machine. A washing machine has the same type of hose connection as a hose spigot outside, so it involves the same kind of connection. Washing machine outlet boxes usually have a three-quarter male hose connection on the valves, so you can go easily from the valve to the back of the washer.
Ice maker supply boxes are used on applications requiring only supply valves recessed into a wall and are designed as a termination point for the water-line connection when installing an ice maker. These boxes usually have a quarter-inch compression connection. An ice maker supply box allows you to push the fridge back as close to the wall as possible.
Utility supply boxes include kitchen, lavatory, toilet and dishwasher applications. These boxes usually contain a 3/8-inch O.D. compression valve pre-installed in the PVC box. Toilet supply boxes have a single valve connection, because this fixture requires only a cold-water supply connection.
Gas supply boxes are used in gas supply systems for residential or commercial applications, including gas ranges, wall heaters, water heaters, garage heater supply, furnaces, laundry washers and dryers. A gas supply box is a big space-saver, because gas fittings are typically larger. Once again, this box allows you to install the fixture against the wall as closely as possible.
What to consider when selecting a supply box
We recommend opting for a modular, universal supply box solution that will allow you to add outlet boxes in whatever configuration works best for your project, including straddling the studs with the water supply on one side and drainage on the other, or even separate walls.
When selecting a supply box, determine if there are any restrictions that would create issues for your application; e.g., pipe material, pipe location, wall-cavity space, etc. Some outlet boxes support a wide range of connections, based on the pipe material. But not every supply box will be compatible with the layout.
For example, if water will be supplied from above, pick a box that can be installed inverted and has space to accommodate the water-supply valves from above and drainage at the bottom.
Along with the water supply, consider how and where the supply box will drain. If you need an arrangement that can accommodate additional drainage, such as a condensate line, consider a supply box with extra options for drainage.
Best practices for your next supply box installation
Step 1: Determine the height of the supply box. The height of the supply box will largely depend on the fixture it will be connected to. We recommend that you check the manufacturer's instructions for specific guidelines for finished elevations.
The maximum height of a washing machine outlet box will also depend on accessories, such as pedestals, and on local plumbing codes. Oatey recommends the maximum elevation of the inside bottom of a washing machine outlet box be 48 inches above the finished floor. The minimum elevation should be 34 inches. This is the same height as the flood level rim of a laundry sink, with or without a cabinet.
For an ice maker supply box, we again refer you to the refrigerator manufacturer's instructions to be sure they don't have specific height guidelines. Since no drain connections are necessary, Oatey Ice Maker Supply Boxes are designed for any elevation installation.
When it comes to utilities like a toilet or sink supply box, the height will depend on where it's convenient near the toilet or inside the cabinet.
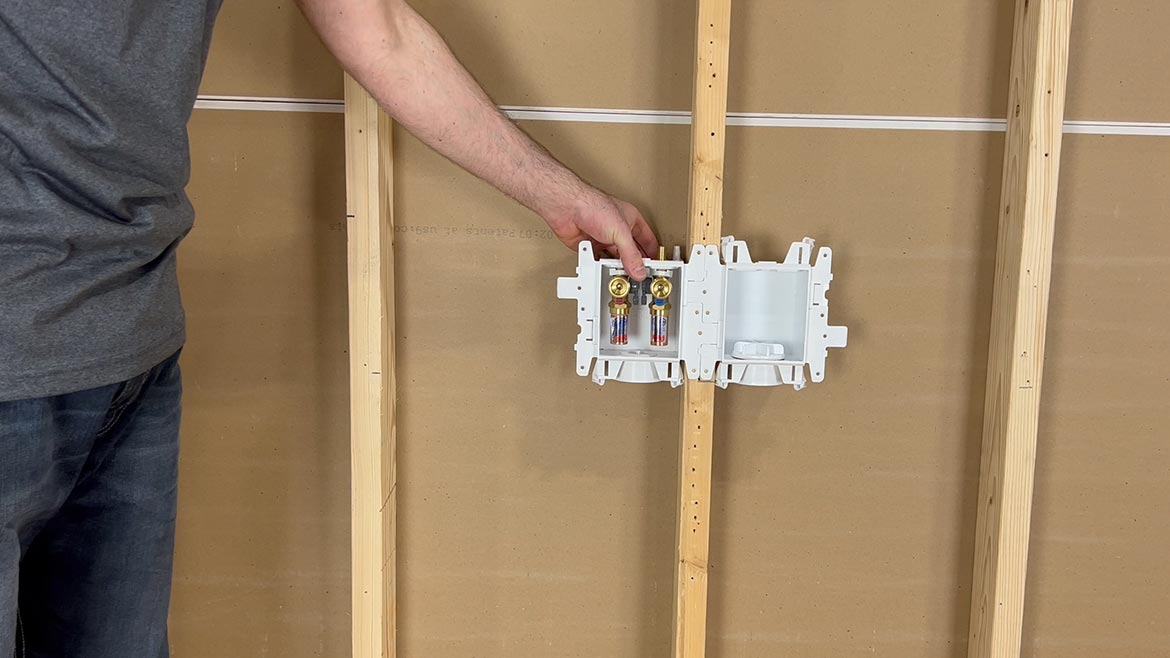
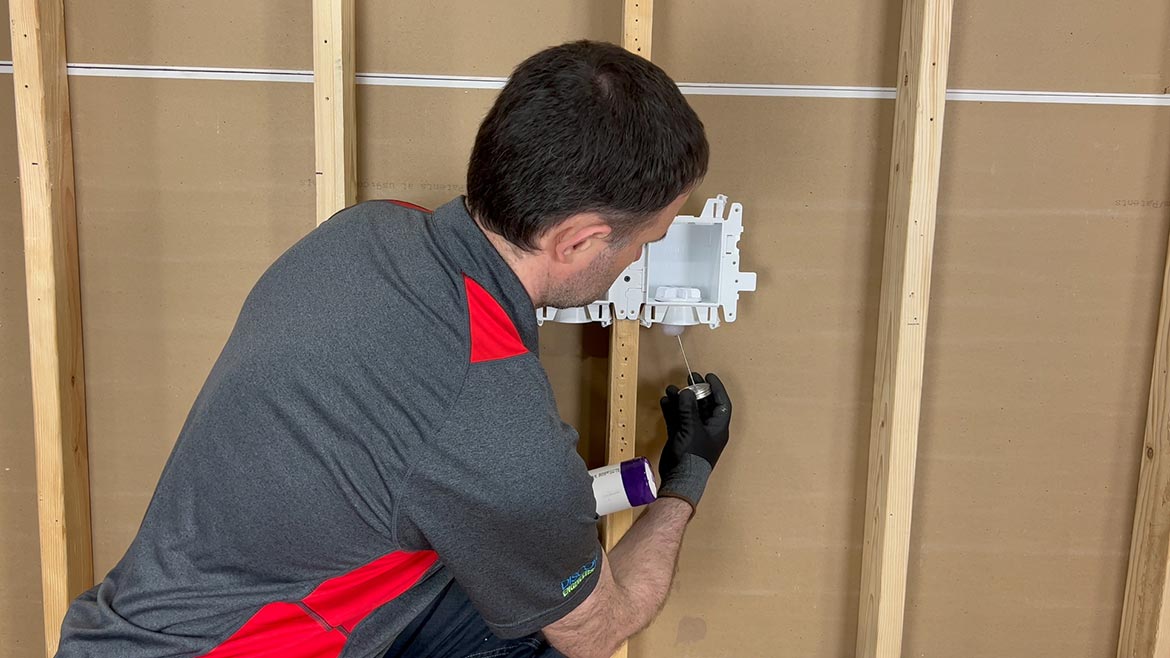
Step 2: Secure the supply box to the rough studs at your location. After nailing the brackets to the supply box:
Align the supply box with your measurement on the studs; and
Secure the outlet box to the studs using screws. Use the correct screws based on the material of your studs; i.e., wood screws for wood, metal screws for metal.
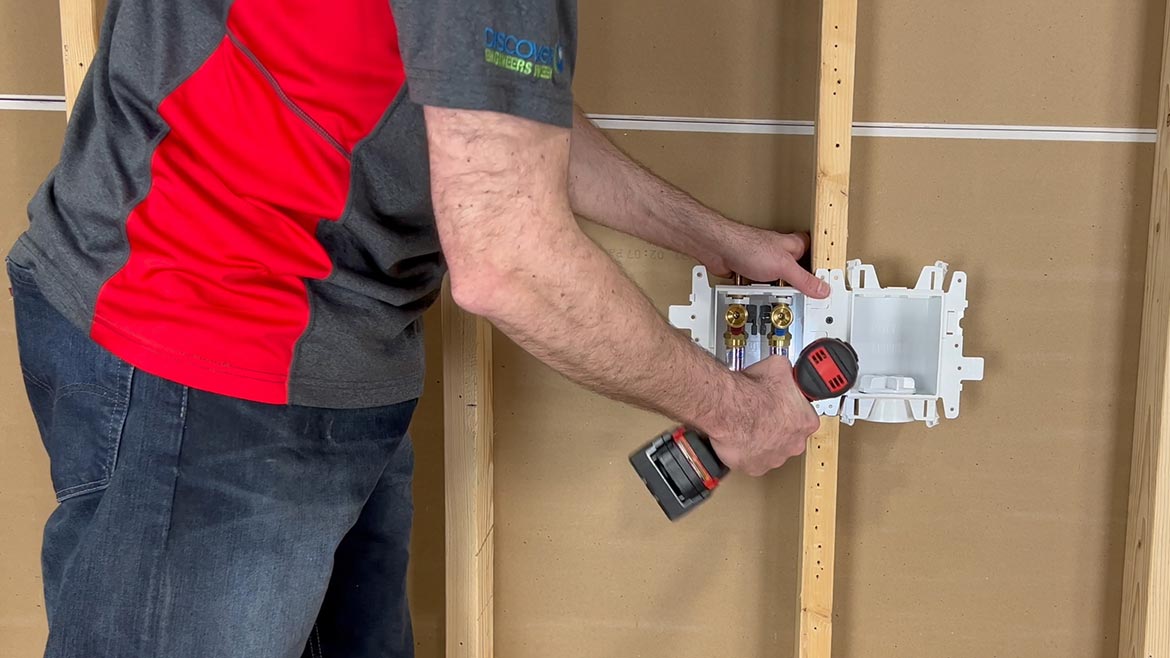
Depending on how the wall is laid out, you may have to span the supply box to fit your space. Make sure your brackets line up. In some cases, especially for a large area, you may need to add another stud to secure the box. Aside from the plumbing configuration, the structural configuration of the installation space may need to be taken into account.
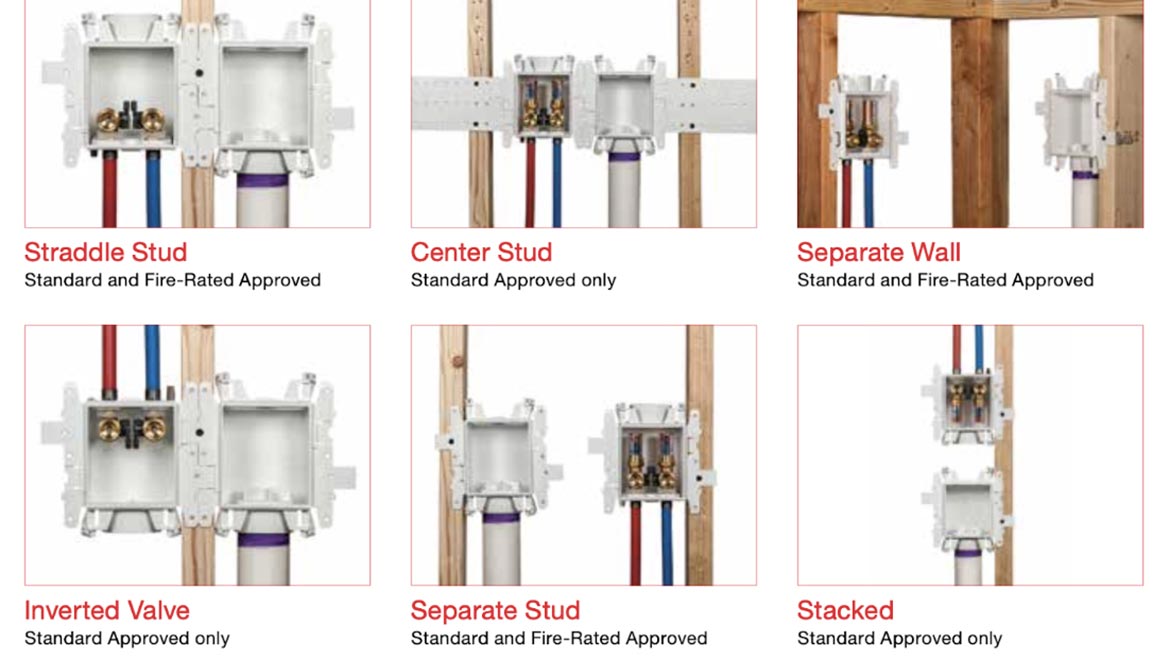
Selecting a universal single-box supply box will allow maximum versatility and installation simplicity on the jobsite. MODA Supply Box installations involve a solid, simple box connection method: Interlocking wing-flanges accommodate on-stud, straddle-stud and three-box installations. The system's snap locking feature provides strength while allowing for easy disassembly and numerous install options; side by side, over and under, inverted valve, and separate wall.
Pictured below are six examples of different types of washing machine installations and the options MODA offers from a layout perspective.
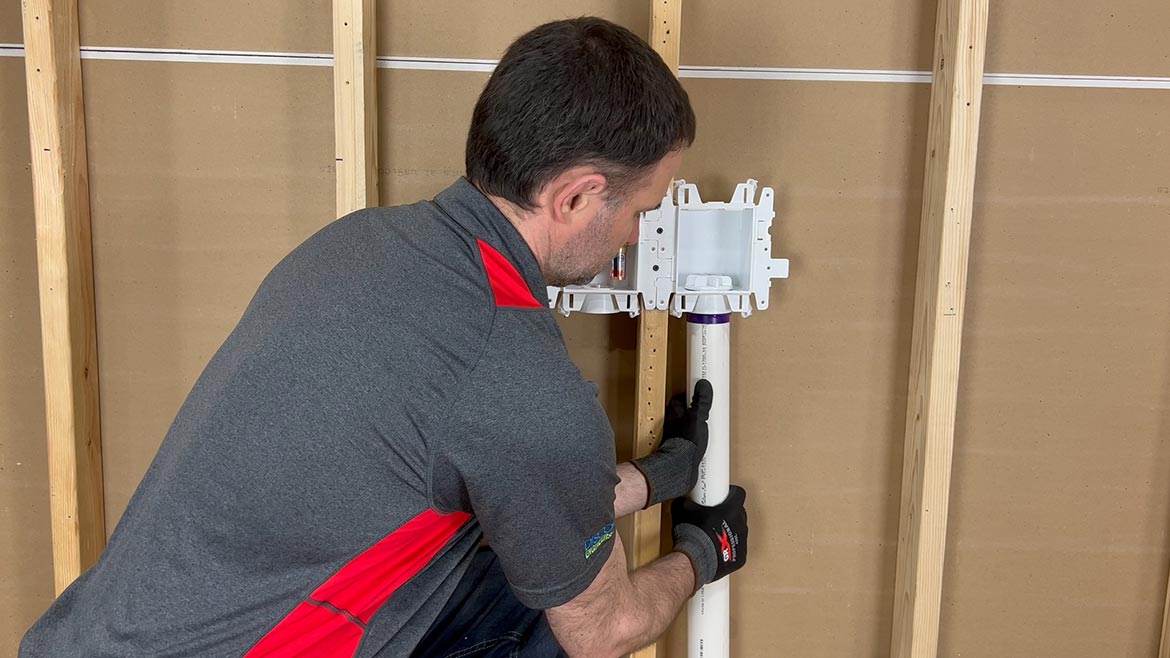
Step 3: Solvent cement the drainpipe to the box. Solvent-cement the drainpipe into the box hub, using approved primer and cement. Oatey supply boxes accommodate connections to copper, CPVC and PEX connections. Avoid these five common solvent welding mistakes when connecting the drainpipe.

We recommend hooking up the drain first, because it's the largest piece of pipe. However, it will depend on your structural configuration. Sometimes you'll have to invert the supply box, in which case the water supply will come from the top of the box.
Job sites can be very tight without a lot of room to install drain and supply lines. When space is limited, an inverted installation allows you to bring the water supply from above, instead of having to fish copper in a three-inch wall past a two-inch drain.
Typically, a 2-inch drain in washing machine installations doesn’t allow you much room by the time you’ve installed half-inch supply lines. If your supply lines come from below, you'll want to put in your drain connection first, so it's easier to install.
Step 4: Secure the water lines into the valve bodies. Depending on the type of connection, you will either make a sweat connection for copper, a crimp or expansion connection for PEX or solvent weld for CPVC.
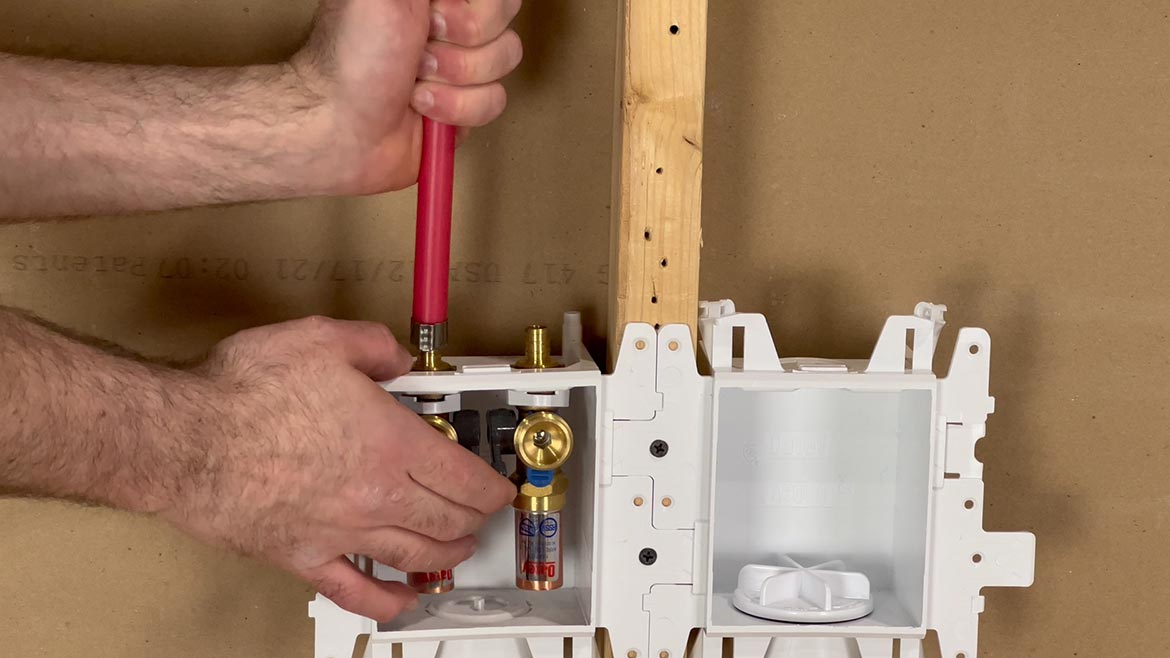
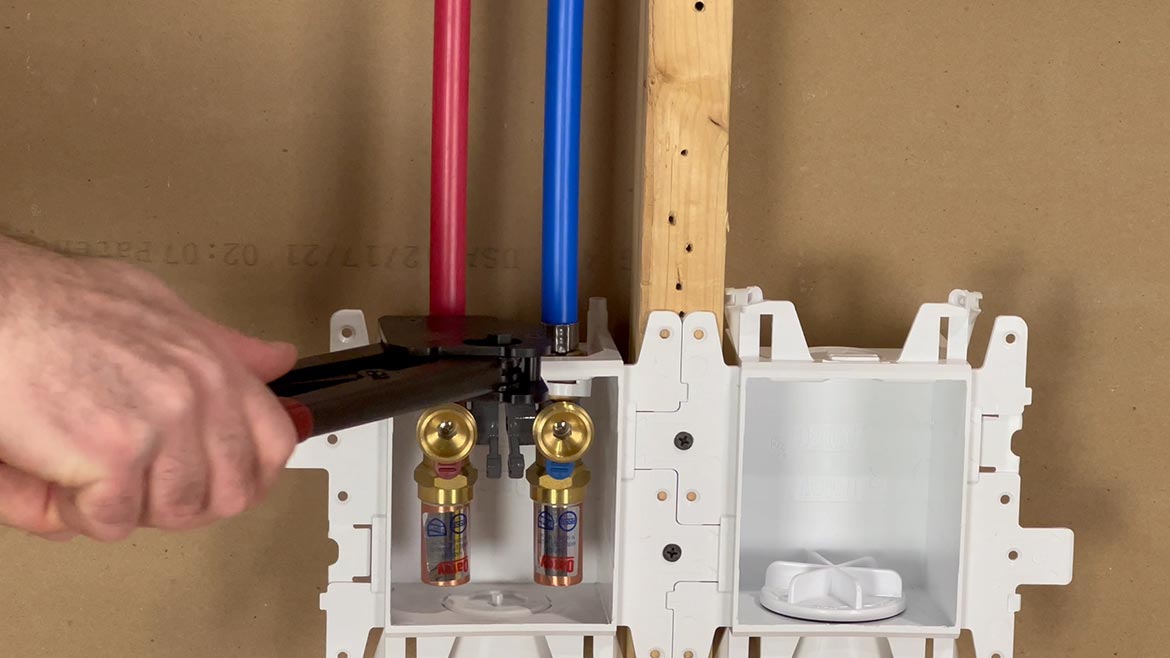
Oatey offers a "Push Connect Valve" which comes as part of its outlet box collection. They are designed to easily accept 1/2-inch copper, CPVC and PEX pipes, by simply pushing the 1/2-inch pipe into the Push Connect Valve Fitting.
If for any reason the pipe needs to be removed after installation, simply use the quick-release tool to remove that section of pipe, and insert the new piece of pipe — no need for solder, pipe joint compounds or thread sealant/tapes. Just cut, de-burr and chamfer (bevel) pipe end before pushing and connecting the pipe.
Step 5: Test the system. Once your drain and water lines are hooked up, your next step will be to turn the water on and test for leaks. Run water through the drain to check for leaks before you install drywall.
Then, pressure-test the DWV (drain, waste, vent) system or branch line and check for leaks in the drain-to-box connection. If pressure testing is not possible, check with your local building officials for an approved testing procedure. Most Oatey supply boxes come with a knockout test plug or a quarter-turn test cap that is rated to 40 feet of head pressure. They can test up to four stories and hold up to the pressure.
After testing the system, connect the supply-line hoses to the valves and insert the drain hose into the drain opening of the box. Once all connections have been tightened, cycle the appliance while checking for leaks.
Step 6: Finish the installation. After installing the drywall, closely consider and leverage the look and feel of plumbing supply boxes. Historically, they have not served users from a design perspective. Until now.
Opt for a system with the same footprint, no matter the application. Whether the job involves washing machines, ice makers, lavatories, a kitchen sink, a dishwasher, or a toilet, MODA offers a consistent look across the entire building or home.
One universal faceplate with a white finish is compatible with all box types, offering a clean, compact look that would fit into whatever design it's applied to. MODA offers three inserts that snap into the standard faceplate — partial coverage, full coverage and louvered.
The great thing is, if you don't want owners to see the inserts, you can paint or even wallpaper over them.
Looking for a reprint of this article?
From high-res PDFs to custom plaques, order your copy today!


