Install a touch screen thermostat for your radiant system
Touch-screen thermostat for radiant

One of the last, detail-oriented aspects of installing a radiant hydronic system is providing your clients with a way to control the thing. After all, a hydronic heating system can get pretty uncomfortable pretty quick if you were to just fire up the system and let it run. As with everything, you need control, finesse — a way to make the system bend to your clients’ wills without any drama or unnecessary gymnastics.
Luckily, there are familiar, two-wire thermostats that make controlling a radiant system a snap. We got our hands on Uponor’s Heat-Only Thermostat with Touch-Screen and found installing the unit and programming it for use can be accomplished in two shakes of a lamb’s tail. Here’s how it goes down:
The first steps, of course, are to unpack the thermostat and make sure you’ve got all the parts, covers, brackets and screws you’re supposed to have. Then make certain the power to zone boards and other devices in the system are shut off so the rest of your day won’t consist of a pop, a blinding blue flash and a ride to the hospital.
Then gather up your tools. For this job you’re going to need a small flathead screwdriver, a Phillips head screwdriver, wire stripper/cutter, a multi-meter and a digital thermometer. It’s also a good idea to have a little experience wiring up low-voltage equipment. This manufacturer recommends the use of 18 AWG LVT wiring for this thermostat.
If you’re replacing an existing thermostat that’s going to stay in the same place on the wall, you can skip this step. But remember this unit wants to be 5 feet from the floor on a smooth, flat surface. Putting the thermostat in places like outside walls, interior walls that heat up in the sun, near windows or fireplaces, in room corners or behind doors will do nothing except ensure it won’t work properly and you’ll get called back to “fix” it.
1. Remove the back plate from the controller and locate it on a wall so the connection wires — the two poking out of the wall — can be run through the wiring opening, a rectangular hole next to the wiring terminals. Align the holes in the back plate so they align with those in the electrical wall box, if applicable, and attach the plate with screws. Use the proper anchors and screws if you’re anchoring it directly to sheetrock. Avoid mounting the controller where the temperature inside the wall differs from the room temperature. If this can’t be avoided, you may have to plug any holes in the sheetrock behind the controller so the difference in temperature doesn’t affect the unit’s readings.
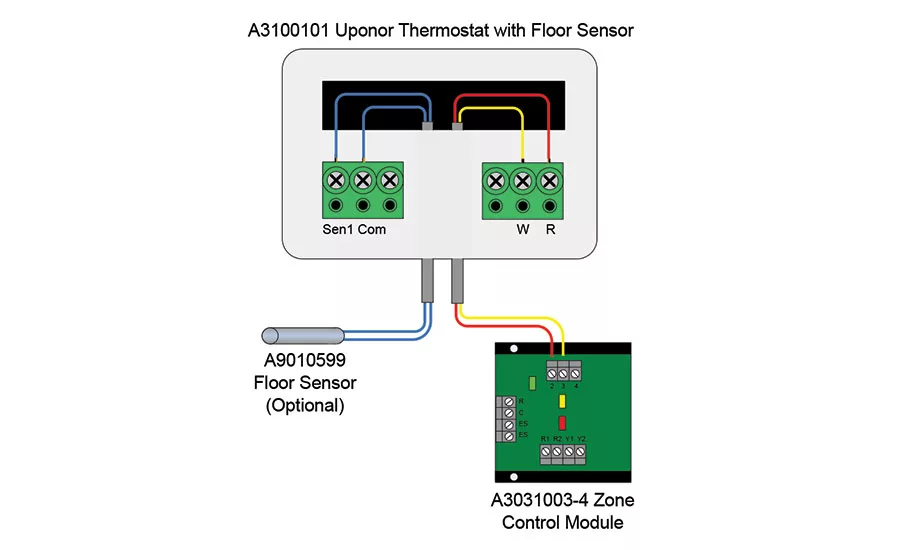
2. With the electrical power shut off, go ahead and strip 3/16-inch of insulation from the wire ends and ensure they’re clean, dry and free from corrosion. Connect the power wires to the “Rh” and the “W” terminals. These correspond to terminals 2 and 3 on the Uponor Zone Control Module. Note the “Rh and “W” terminals don’t care about polarity. If you’re installing the optional floor sensor, connect the wires to the “SEN1” and “COM” terminals in the thermostat. [Since we’re concerned with the thermostat here, we’re going to leave it to you installers to read about how to install the optional floor sensor. –Ed.]
3.This step is pretty much like any other thermostat installation. Locate the tabs and corresponding holes on the controller and the backplate. Hinge the bottom of the thermostat onto the wiring terminals until it engages with the connectors. Then, using gentle pressure, press the bottom of the thermostat until it “clicks” into position.
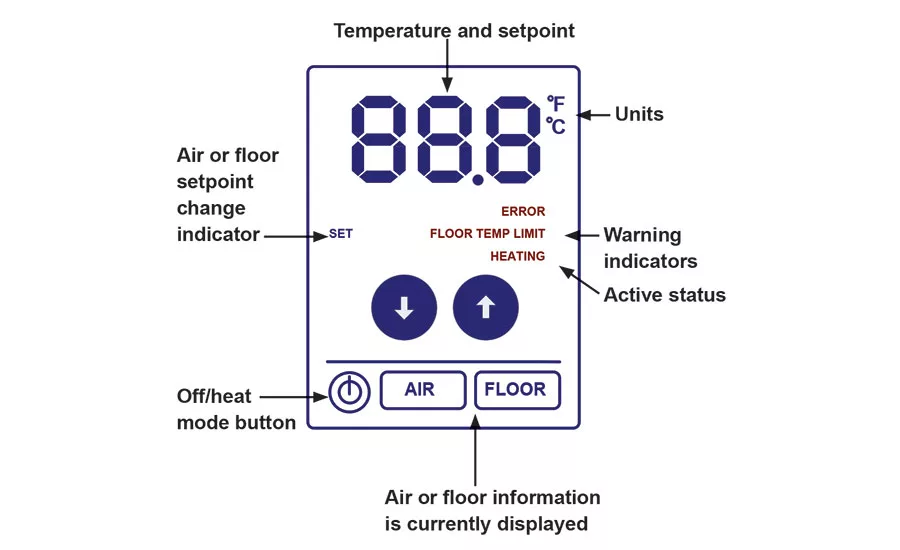
4. So far, this project has been a simple thermostat swap. Mechanically we’ve hardly differed much from instructions that will guide you through almost any thermostat installation. Now things get a little technical but don’t worry — this is all touch screen stuff and, if you can use a phone or tablet, you can handle this no sweat. Without going into excruciating detail on this thermostat’s four modes (Heat, Operative Temperature Sensing, PWM Mode and Freeze Protection), the thermostat employs a capacitive touchscreen just like the one on your phone or tablet device. The diagram on the previous page gives you a look at the screen layout.
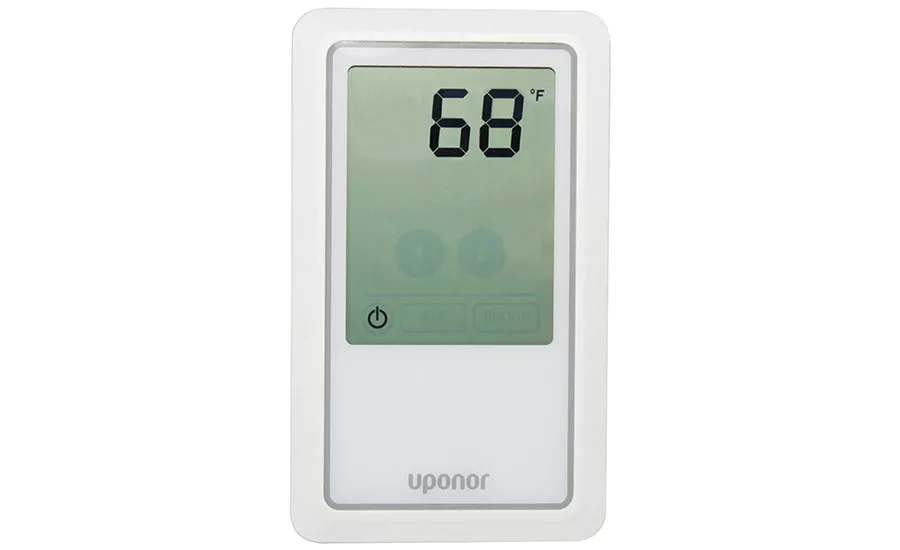
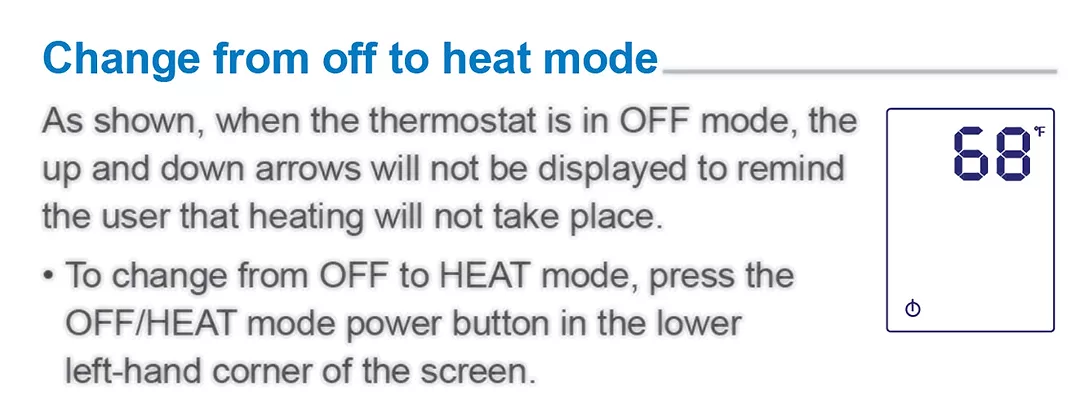
5. When the thermostat’s off you can see the temperature and the on/off button on the screen. Just press the on/off button and you’re suddenly in Heat mode. As a further reminder the unit’s off, you won’t see any arrows to adjust heat up or down.
6. When the thermostat’s on but hasn’t detected any activity for five seconds, it will default to displaying the air temperature. You’ll see a rectangle around the “AIR” button as a hint. To adjust the air temperature setting, just change the air set point by making sure the thermostat is in Heat mode and pressing the arrows up (warmer) or down (lower). The SET indicator will appear and flash with a horizontal bar.
7. To make the floor temperature warmer or cooler you’ll need to select a floor temperature set point. Again, make sure the thermostat is in Heat mode and push the FLOOR button to select it if necessary. Again, adjusting the temperature is as easy as pressing an up arrow for warmer and a down arrow for cooler.
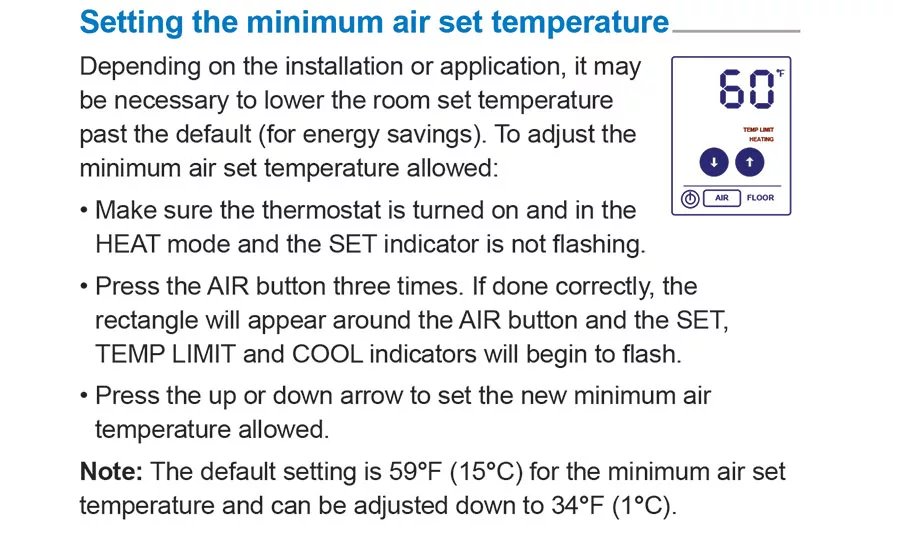
8. In addition to the customer-made adjustments, this unit features several advanced settings that should only be adjusted by a qualified installer. For example, the thermostat is set from the factory to show degrees Fahrenheit. To change the displayed units from Fahrenheit to Celsius, make sure the thermostat is in Heat mode and the SET indicator isn’t flashing. Press the AIR button once to activate it and the unit indicator will start to flash. Use the up or down arrow to select your new display units and the change will be accepted after five seconds. Other advanced settings available include adjusting the minimum and maximum air set temperatures and the maximum floor protection limit. The air sensor can be disabled, too, if you’re in a radiant-only situation.
"This article was originally posted on ww.reevesjournal.com."
Looking for a reprint of this article?
From high-res PDFs to custom plaques, order your copy today!