A look at linear drains
Guidelines to determine the correct product and installation choice for your application.

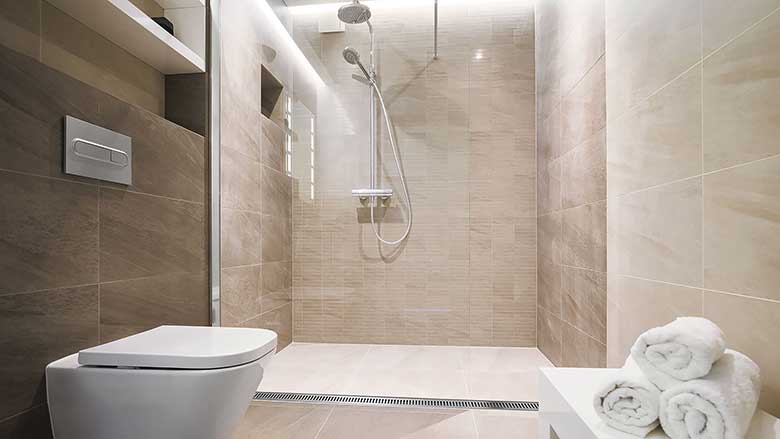
When installing a barrier-free shower, the linear drain's location will depend on the floor system. Photos courtesy of QuickDrain USA.
As with any construction or remodeling project, there are several key factors to keep in mind when selecting and installing a linear drain system for a bathroom shower. Being mindful of these considerations will ensure optimal performance.
Site conditions
First and foremost, when constructing a shower, whether you're using a preformed pan or a mortar bed, be sure that your subfloor is level, clean and structurally sound. When installing tile showers, be sure that the subfloor is free of defects and meets all TCNA (Tile Council of North America) standards.
Choosing the location of the linear drain may depend on the existing waste line. More often than not, it's extremely costly to move the drain location; however, a linear drain with a side-waste outlet can connect to the drain line without moving the plumbing. The versatility of the linear drain system allows for both vertical and side waste outlet configuration options. It will accommodate an outlet that is not perfectly centered by using trough extensions. Aesthetically, an off-center outlet will not be an issue once the one-piece cover spans the entire width of the shower concealing the fact the outlet was not perfectly centered.
Another aspect determining the linear drain's location is whether the shower will be curbed or curbless. If it's a curbed shower, the linear drain can be placed anywhere inside the curb.
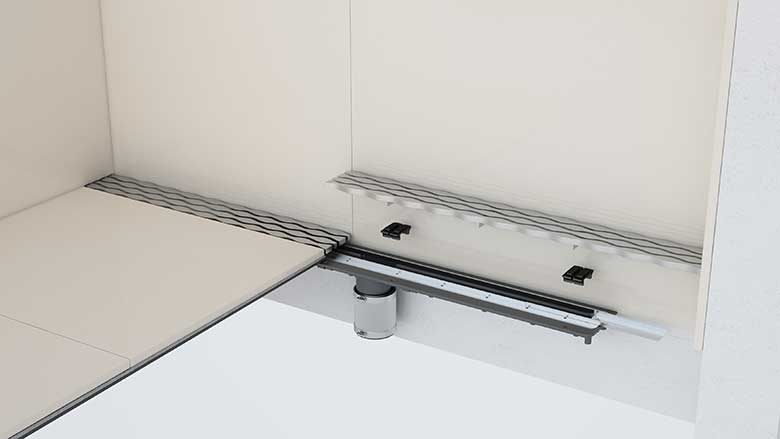
However, when installing a barrier-free shower, the linear drain's location will depend on the floor system. If it's a concrete floor, or if you can't recess the shower footprint into the floor joists, we recommend installing the linear drain at the shower's entry, flush on the subfloor with proper blocking below. That way, you can slope the concrete or pan system from back to front without affecting the elevation of the bathroom floor.
Curbed vs. curbless
The linear drain should extend wall-to-wall for a curbless shower to ensure the most efficient and effective drainage. Opt for a linear drain that can be customized to provide wall-to-wall coverage and be sure that the linear drain has integrated slopes to efficiently and effectively evacuate water from the drain body while being self-cleaning.
A linear drain system with trough extensions and covers that can be trimmed onsite will allow you to accommodate exact dimensions. Wall-to-wall coverage will allow for a single slope toward the drain, ensuring that water won't pass the drain.
If you're looking for something different, consider a linear drain where the water exits via the downward slope of the shower pan into a drain channel concealed at the base of the wall. Nearly any solid surface tile can be installed in the hidden drain's magnetic vertical cover before it is attached to the shower wall, resulting in a seamless and fully integrated design.
In a curbed shower, any linear drain should provide efficient drainage if the shower floor is sloped properly and the drain accommodates the flow rate of the shower fixtures. This is true whether the drain is located in the center, along the back wall or at the shower entrance.
Flow rates
When selecting a linear drain, be sure it can handle the combined flow rate of the various shower fixtures — showerhead, handheld shower, body sprays, etc. The drain location — at the entrance, along the wall, or centered — will also impact the recommended limit of the shower drains flow rate.
Installing the linear drain at the entry of a curbless shower results in the shower's flow-rate limit of 5 gallons per minute (gpm). Today's standard, shower fixture flow rates are well below 5 gpm because most have been reduced to 1.5 gpm to conserve water.
However, if you have multiple showerheads, body sprays and hand showers all activated simultaneously, you would likely exceed their combined flow rate of 5 gpm. In this instance, a back-wall drain install would be ideal, as it will handle 10-12 gpm.
The water volume will be much higher — up to 20 gpm — in a significantly larger shower with multiple fixtures. Here, we recommend installing two linear drains in series (or end-to-end) to accommodate the increased flow rate.
Waterproofing
Many installers make the mistake of not pre-sloping before installing the waterproofing layer or liner. Just as with a traditional shower pan liner installation, it's important to pre-slope the floor before you install the liner, which will allow for the capture of weep water to the drain via the drain's integrated weep holes.
When utilizing topical waterproofing, even with a mortar-bed install, be sure to use the proper waterproofing method (sheet or liquid with plastic drain bodies) and liquid specifically with stainless steel drain bodies.
A complete shower system installed to the manufacturer's specifications is the best way to ensure a properly flowing, draining and waterproofed pan system. Opt for a system that includes a pre-sloped shower pan and topical sheet or liquid waterproofing accessories. A pre-sloped pan will eliminate the inevitable human error involved with floating a mortar bed.

Pre-sloped PET shower pan systems accommodate finished shower dimensions between 32 inches to 72 inches, with an interlocking design that can be quickly and easily modified to any size or shape directly onsite. Unlike conventional, pitched mud beds constructed over two days due to the multiple layers of mortar, PET shower pans can complete a pan installation and be ready for tile in less than one day.
Looking for a reprint of this article?
From high-res PDFs to custom plaques, order your copy today!