Dave Yates: Take a seat
Tips and tricks for repairing older faucets.
My apprentice years were filled with a wide exposure to all manner of plumbing and heating jobs. At that time, F. W. Behler had just four seasoned employees who had been with the company for many years. Paul Strayer was an outstanding retrofit plumber with an abundance of patience — he tolerated me after all! Smoke, whose real name was Elton Rehmeyer, was the expert repair technician for all things from faucets to steam boiler controls. We discovered, many years later during a company Christmas party, that it was his uncle who was murdered in an infamous crime known as the Hex Murder of Rehmeyer’s Hollow. Smoke was just a young boy when he and an uncle discovered the body. Beyond that, there were two younger men who handled larger installations and new construction jobs.
Working with Smoke was, for me, a real treat and presented the opportunity to learn the finer art of top-notch repair work. No one — and I’ll repeat that — no one was better at repairing faucets and toilets than Smoke. Smoke, like all the other seasoned veterans working at Behler, gave me loads of opportunities to participate in expanding my skills by jumping in with both feet to tackle the more advanced work, with supervision, naturally.
Then came a new hire that was a loud-mouth a-hole of major proportions. I ended up being assigned to him as the apprentice and work became a miserable experience. Time to move on, and, as they say, timing is everything. A new start-up PHVAC firm was looking to hire a service mechanic and hired me to head up their service division. Every week, we would meet to go over the jobs performed, and let’s just say they really hated callbacks. I recall catching the devil for constantly running to supply houses for faucet stems and seats. Then, when I would skip replacing faucet seats, I’d end up with callbacks! Catch 22, and I was tired of the back-and-forth during our Friday evening (on our own time, mind you) arse-chewing sessions.
The following Monday, while waiting at a supply house counter to obtain some brass faucet seats, I mentioned the really nice kit they had full of all manner of faucet seats. The cost was well in excess of a hundred dollars, which I knew would land me in the Friday evening doghouse. It did. I began saving every faucet seat I replaced in a large coffee can. I knew the cost average for standard brass seats and what they were charging for them. Sure enough, a few months later, my two bosses were fussing about the cost for that seat kit, so I produced the overflowing coffee can and told them they were looking at a tidy fat profit they had made. Besides which, I added, by eliminating the literally hundreds of trips to the supply house, I was more productive with virtually no callbacks and reduced wear/tear on the van, plus less gas expense. End of argument!
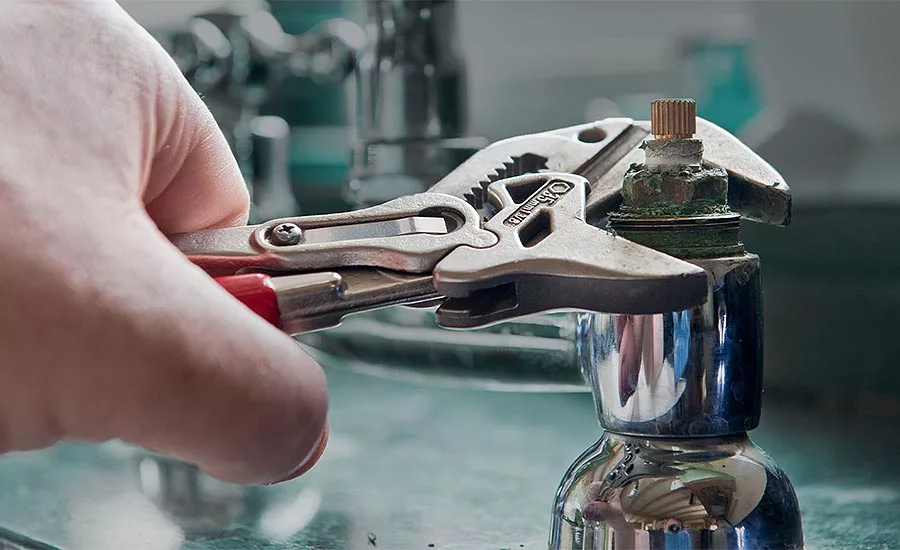
If you are servicing older homes, you will no doubt encounter older faucets that the owners do not want replaced under any circumstances. Disassembly is required to begin this task and marring/scratching the faucet finish while using toothed plyers is the mark of a hack — don’t do that! Both Smoke and Paul had sheet-metal covers for their faucet (and flush valve) plyers if an adjustable wrench jaw wasn’t wide enough. They would place a cloth strip between the sheet-metal slipover covers to ensure the protection of the finished surfaces. As they both intoned: do it right or don’t touch the faucet! I used fabric spray-on glue and strips of felt for mine.
I’ll let you in on my tips for replacing faucet seats to virtually eliminate callbacks. Renewable seats will either have a square or hexagonal opening for utilizing a seat removal tool. Tip: Wrap a bit of Teflon tape around the business end so the seat doesn’t fall off once it is ready to be lifted out of the faucet body. Closely examine the seat’s surface for defects to determine if that was the source of the dripping faucet. It’s out — don’t reuse the old seat! Match the old seat to the new seat from your kit and place the old seat in the same box so that when you go to reorder, the old seats will be a stark reminder of which ones are needed. Place the new seat on the hex or square seat tool. Tip: This one eliminates callbacks! While holding the seat removal tool in your left hand, wrap Teflon tape clockwise around the threads just below the head of the seat. Remove/trim excess Teflon tape using a sharp knife at the bottom of the seat and reinstall in the faucet. A pro will replace both seats even if only one of them has an obvious defect — the intent here is elimination of callbacks while providing a top-notch repair.
But what about faucets with non-removable seats? Great question! A high-quality seat dressing tool (not a cheap seat grinder, which leaves a rough surface) like the bib seat forming tool by JA Sexauer will return the seat to as-new condition. You can pick one up for a very reasonable cost by searching online.
The tool has several adapting ends to enable you to capture the stem opening on the faucet body, internally or externally, which centers the tool directly over the seat. Choose the head that matches the indentation on the bib washer, attach the tool, work the stem down until it rests firmly against the seat, and begin working it clockwise while continuing to tighten down the stem until you have provided a renewed polished seat.
Next came the bib washers and always install new bib screws. Tip: Before installing the new bib screws, place the threaded end at an angle across the teeth of your adjustable plyers and squeeze to mark it with an indentation across the threads. That provides for secured installation of the bib screw, allowing you to tighten it down onto the bib washer without squashing the bib washer and prevents bib screws from loosening. Ever hear a loose faucet bib washer when running a faucet? Sounds like a machine gun in action! If you’ve done the job properly, flat bib washers will be all that’s required.
If the bib washer cup on the stem is at all compromised – missing a portion, cracked or deteriorated, you’ll need to break off the remainder, file it flat, and install a new brass retainer cup. Parts like that are available from many suppliers such as RPM Products, which picked up the former Radiator Specialty Co.
The stem must be checked for wear and tear, too, as well as the internal threads in the faucet body. How’s the packing? Hard as a rock? That too gets replaced as needed, and of all the crazy things, we used graphited asbestos wicking for that purpose! I still have several rolls. We also used wicking yarn cotton threads that we dragged through the heat-proof grease to impregnate the cotton wicking. Tip: Install the packing, tighten the packing gland to compress the new packing, open it back up and add additional packing until you have adequately filled the packing gland so that future compaction adjustments are possible.
Last, but certainly not least, I’m going to add some heat-proof grease to the stem to allow for easy turning of the stem after tightening down the packing gland. One faucet to be careful of when using heat-proof grease (or silicone grease) is the American Standard Aquaseal faucets because too much O-ring/stem lubricant will make you think a poltergeist has settled in as you watch the faucets stems turn themselves on! No worries, simply disassemble and, using a clean rag or paper towel, wipe off the excess grease.
Give yourself a pat on the back for a job well done!
BigshotD3p/iStock / Getty Images Plus via Getty Images
Looking for a reprint of this article?
From high-res PDFs to custom plaques, order your copy today!